Solar-Charged Lawnmower
A yard-sale mower converted to battery-electric and charged from an 11 W panel.
Source: https://www.appropedia.org/Solar-charged_lawnmower. Original author: Jeremy James (User:Anonymous1), Cal Poly Humboldt · CC-BY-SA-3.0.
- Estimated cost
- $699.00
- Parts
- 10
- Tools
- 4
- Time
- Several weekends
- Motor
- Dayton 3/4 HP, 12 VDC
- Battery
- Sun Xtender 40 Ah deep-cycle
- Solar panel
- 11 W, 16.5 V operating, 0.62 A in full sun
- Charge controller
- Morningstar SunGuard 4.5 A, 12 V
- Total as built
- $699.00
Summary
A $5 yard-sale lawnmower stripped of its internal combustion engine and rebuilt around a 3/4 HP 12 VDC motor and a 40 Ah deep-cycle battery, charged between mows by an 11 W solar panel.
Build steps
7
-
Strip the old mower
After searching various yard sales I found and bought this old lawnmower for $5.00. I was hoping to remove the internal combustion engine by loosening the bolts that attached it to the mower deck. No such luck. They were rusted to the deck so I spent a large amount of time cutting the deck with a rotary tool to allow the engine to be removed. I used some spray on paint remover to remove a majority of the red paint. Then I used a wire brush to remove all the rust. After that I sprayed the rust spots with a rust retardant to stop the rust from spreading.

The donor mower before stripping -
Fabricate the deck
After stripping the mower and removing the engine I was left with a mower deck with a huge hole in it. I went to a local scrap yard and found a couple of small sheets of stainless steel about 1/16" thick. I then cut the steel to the proper size to cover the hole in the deck.

Patching the deck -
Mount the motor
When mounting the motor to the mower deck the most important thing was to make sure it was centered and properly secured. I made sure it was centered by measuring an equal distance from the sides of the motor to the outside diameter of the mower. I secured the motor to the deck with four 3/8" bolts.

The motor before mounting -
Mount the blade
Unfortunately, when removing the old blade from the old mower I was unable to salvage the piece that attached the engine shaft to the mower blade. This meant that it was necessary to fabricate my own blade mount. I found a piece of metal rod about 3/4" in diameter in the scrap pile in the HSU metals lab.

The fabricated blade mount -
Mount the battery
Once the motor was mounted I needed to find a place for the battery to sit. The base of the motor was facing the rear of the mower and would provide a solid mounting surface for the battery mount.

Finished battery mount -
Wire the electrical system
The electrical was one of the more complicated parts of this project. I had originally thought it would be rather simple, just run some wires from the battery to the motor, add a switch and that would take care of it.

Mower wiring diagram -
Build the solar charging station
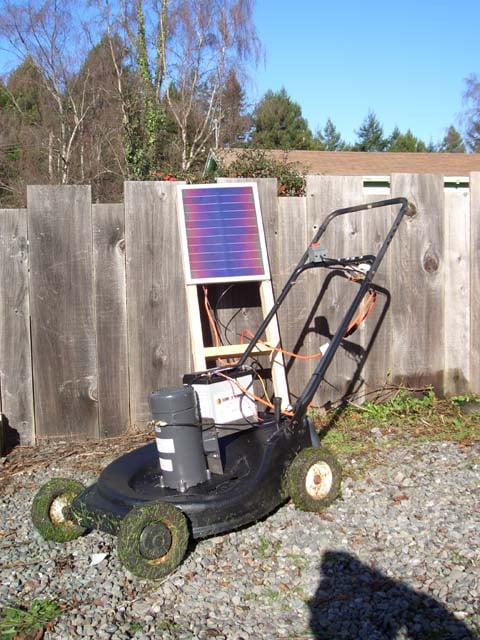
After the mower was assembled and ready to go I needed a way to charge it. I used an 11 Watt Uni-solar panel that plugs into the mower when not in use. This panel is made to charge a 12V battery at 0.62 amps in full sun. I screwed a couple 4' long 2x4s to three cross supports to serve as a mount for the panel.

Solar charging station