One of 4 builds of Rocket Stove
Rocket Lorena Stove
A two-pot earthen stove built from anthill soil, sand and sawdust.
Source: https://www.appropedia.org/Rocket_Lorena_Stove. Original author: User:Cgfoz · CC-BY-SA-3.0.
- Estimated cost
- —
- Parts
- 6
- Tools
- 1
- Time
- A few hours plus several weeks drying
- Pot rests
- 2
- Chimney height
- 1-2 m
- Drying time
- Several weeks
- Expected life
- At least 10 years
Summary
The rocket-lorena stove is a two-pot rest stove and has an efficient conversion chamber which requires very little fuel. It has a firewood chamber and a chimney which further improves efficient burning. It can be made from locally available materials and so is affordable.
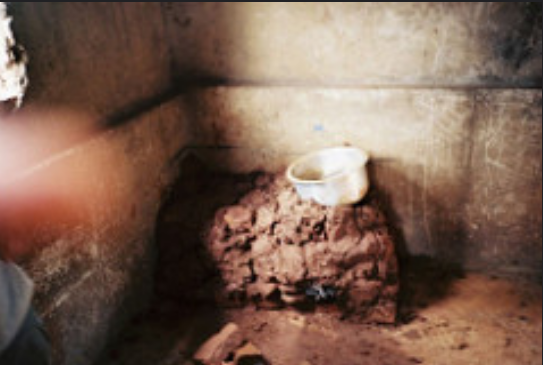
It is a great improvement over the normal three stone stove, that is common in villages, because of the vastly reduced fuel consumption, its simplicity to use and the short time it takes to cook food. The chimney mechanism reduces smoke and associated problems and it is firmly attached to the ground meaning there is less risk of injury occurring from spillages or accidents.
Its disadvantages are that it is less portable than the three stone stove and occupies a larger space. The rocket-lorena normally takes a number of hours and several people working to finish. That said once built, it is long lasting and durable (at least 10 years).
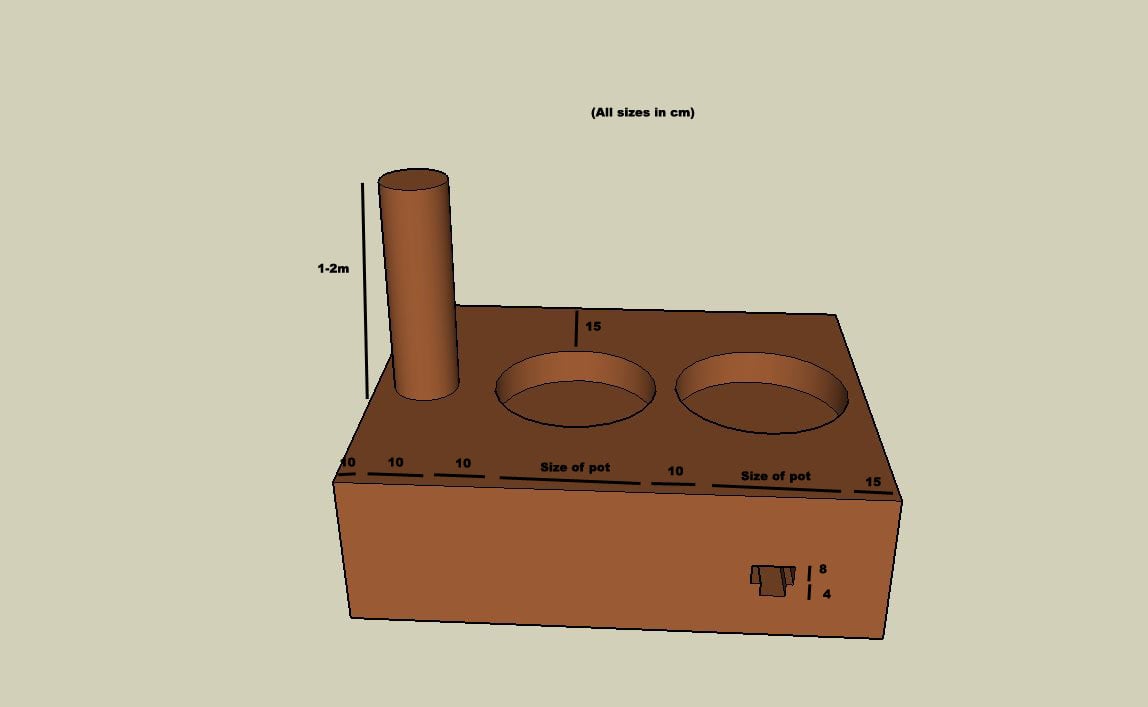
Model & drawings
2
Build steps
5
-
Prepare the two mixtures
Mix one wheelbarrow of anthill soil with one wheelbarrow of sawdust — add water gradually and knead the mixture as water is added. The mix is ready when it has a firm mortar-like consistency.
Mix two wheelbarrows of soil with one wheelbarrow of sand/silt. Add water gradually and knead as water is added.
-
Lay the foundations
As the stove will be located in a hut over a long period it is best to position the stove in a corner and on a reasonably flat setting. First mark the area for the stove. Pour water on the foundation area. Add a layer of soil/sand mixture and then lay 1 layer of bricks. The bricks should be separated by approx 1cm; in between the bricks, fill with soil/sand mixture like building a normal wall.
-
Position the firewood chamber
The firewood chamber needs to be set now. This will be below the position of the first pot. Measure this position — it will be approximately 15cm plus half the diameter of the first (largest) pot.
Get two bricks and wrap each in plastic bags. Fix the first in position to form what will be the firewood chamber and the second to form what will be the conversion chamber.
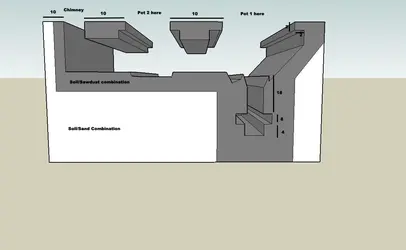
Cross section of the stove, all measurements in cm -
Build the main stove
Build up the structure to the appropriate height using bricks and the mixtures as mortar. Wherever heat is likely to be transferred use the soil/sawdust mixture rather than the soil/sand mixture — for example all around the firewood and conversion chamber bricks.
Put the pots to be used in place and complete the stove, building around them. You will need to hollow through between the pots and then through to the chimney. Build the chimney: it needs to be 1-2m high. This pulls the heat through the combustion chamber to the second pot.
-
Final touches and drying
The firewood and combustion chamber can now be completed by removing the bricks to leave a hole for these chambers. Fix the firewood shelf in position.
The stove needs to be left to dry for several weeks. After several weeks the stove will dry. The materials will naturally crack to some extent; any cracks can be filled by making more of the soil/sand mixture and filling.